Appendix A: Setup
If you're new to the shell, this appendix will walk you through how to access the shell on your machine, configure your system, and install some software to set up a simple and standardized shell environment.
You can skip this appendix if you are already comfortable running a shell in a terminal program and have a recent version of Bash or a Bash-like shell installed.
Accessing the Shell
The name of the shell program you'll use and the way you access it will differ depending on your operating system.
Microsoft Windows
A number of shell programs are available for Windows. You'll be using Command Prompt, the basic shell program that comes preinstalled in Windows.
To open Command Prompt, click the Windows icon to open the Start menu and type command prompt in the search box.
When Command Prompt opens, type whoami and press Enter. You should see the username of the logged-in user, as shown on the second line here:
C:\Users\dave>whoami
davekerr9d36\dave
That's all there is to it! You've still got some configuration to do to make Command Prompt behave more like a Linux shell, which this book uses as the standard, but you'll learn about that in the next section.
macOS
If you're using a Mac, you'll use the Terminal program to open your shell. Press Command-Space and then type terminal.
When Terminal opens, type whoami and then press Return. You should see the username of the logged-in user, as shown on the second line here:
% whoami
dwmkerr
That's it! In the next section, you'll make some minor configuration changes to keep things consistent with the examples in the book.
Linux
If you're using a Linux or Unix system, I'll assume that you're familiar enough with it to open a shell. Your specific shell (known as a terminal in Linux, not to be confused with the Terminal program in macOS) should not affect how you use this book, but note that most of the book's examples use Bash version 5.
Configuring the Shell
Shells can vary enormously between different systems. In general, Linux systems tend to use Bash and require little configuration. macOS is based on BSD Unix and differs under the hood from most Linux systems. Windows is completely unrelated to either Linux or Unix and operates in a fundamentally different way from both of them.
In this book, I assume that you are using a "Linux-like" system---that is, one that operates like a modern Linux distribution. This is a deliberate choice. Once you're comfortable using a Linux-like shell, you can generally apply the techniques shown here to macOS with no difficulties. For Windows, the techniques are not necessarily transferable immediately, but they're still valuable to know. Windows is increasingly making its own shell environment more Linux-like with the Windows Subsystem for Linux (WSL). However, WSL does require some setup, which I'll describe shortly.
This section will ensure that you're running a Linux-like setup, preferably with the latest version of the popular Bash program. If you are familiar with Bash but prefer to use another shell, that's fine---most of the book will work with any modern shell. However, if you have no preference, I recommend following the guidelines given here.
Microsoft Windows
Because Windows isn't anything like Linux under the hood, it takes a few steps to get a shell working. You have three options:
- Install Linux Tools - Probably the easiest option and the one I would recommend for most users. You'll be able to run a Linux-like shell when you choose to, but it won't interfere with your day-to-day computer usage.
- Run a Virtual Machine - The best option if you want to practice with the shell but keep it completely separate from your main computer and files. Virtual machines are a great way to create a Linux sandbox.
- Set Up the Windows Subsystem for Linux - Best for power users or experts who want to use the latest WSL features and build their skills with the platform as soon as possible.
Option 1: Install Linux Tools
To get a Linux-like experience on a Windows machine, you'll install Cygwin. Cygwin provides a large set of programs that are designed to work on Windows and are generally available on Linux systems.
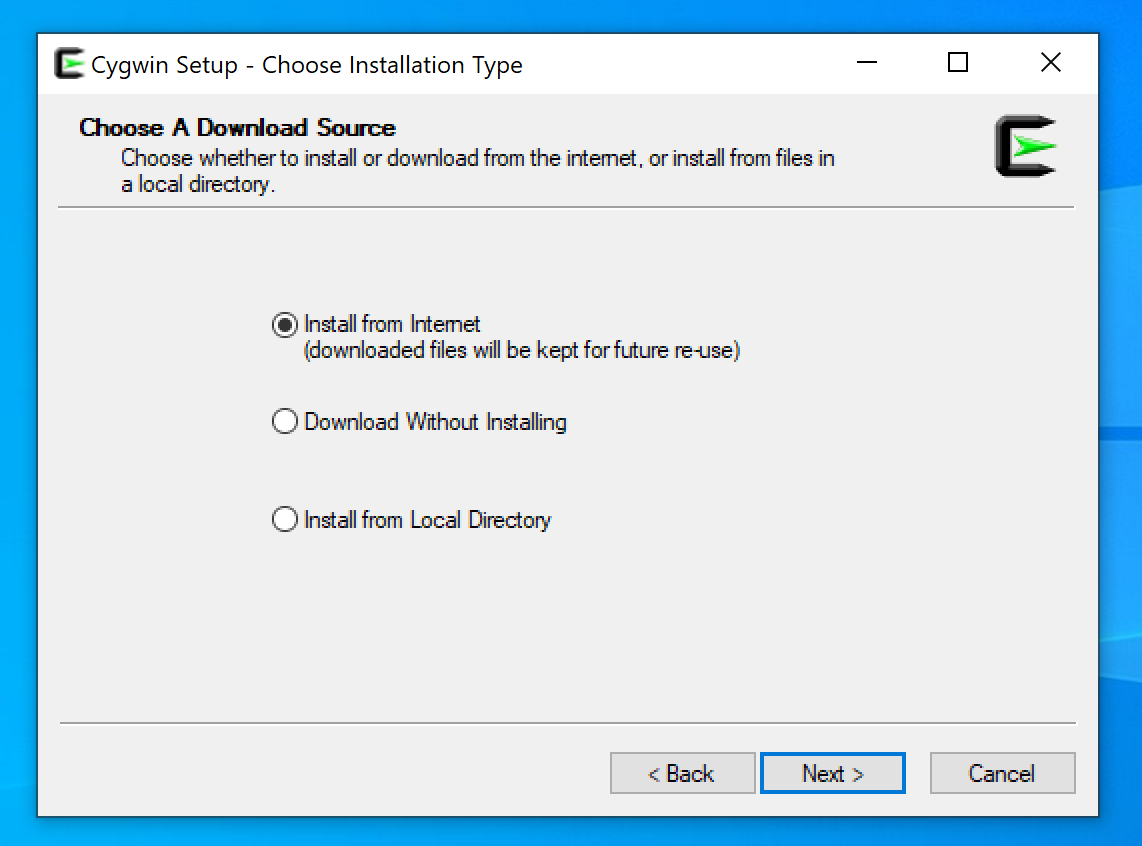
Go to https://www.cygwin.com to download the Cygwin installer. Start the installation. When prompted to choose a download source, make sure Install from Internet (the default) is selected, and then click Next:
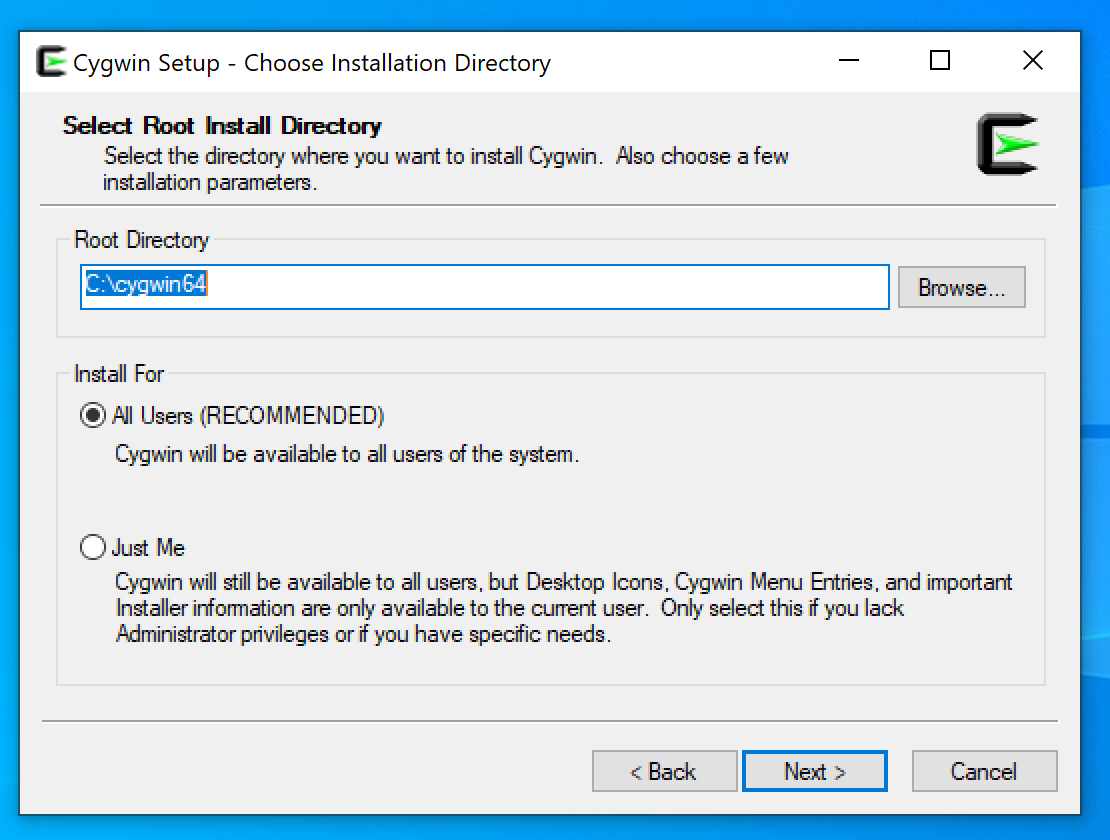
In the Select Root Install Directory dialog, leave the default location selected and select All Users. Click Next:
In the next dialogs, Cygwin will ask you where to install downloaded packages, whether a proxy is needed, and what download sites to use. Leave these options at their default settings unless you know what you're doing and why you'd need to change them.
Once Cygwin has downloaded the list of available packages, it will ask which packages you want to install. Choose the default option, All, and click Next.
When Cygwin has finished installing, you'll have a link to open Cygwin available on the desktop and the Start menu. You can click this link to start using Bash. Or, if you prefer, you can open Command Prompt as described earlier and type the command bash --norc to start a Bash session.
Option 2: Run a Virtual Machine
Using a virtual machine is the best option if you want to practice with the shell but keep it completely separate from your main computer and files. Virtual machines are a great way to create a Linux sandbox, an isolated environment where you can safely experiment without affecting the rest of your system.
There are many ways to run a virtual machine on Windows. For this example, you'll use a free Oracle tool called VirtualBox to host a virtual machine on which you'll install the popular Ubuntu distribution of Linux.
First, go to https://ubuntu.com/download/desktop and start downloading the latest version of Ubuntu's Desktop Edition. The file is quite large, so the download might take a while. In the meantime, you can install VirtualBox.
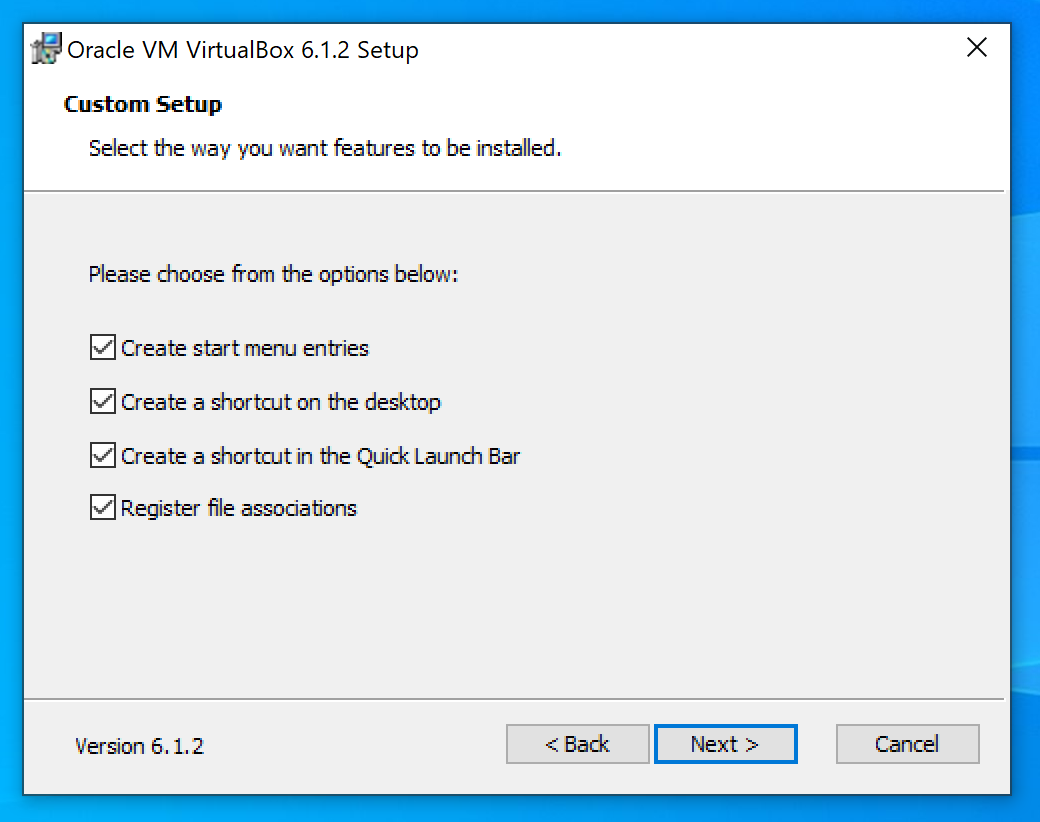
Go to https://www.virtualbox.org/wiki/Downloads and download the VirtualBox installer for "Windows hosts." Run it and click Next from the first screen to start the installation setup.
First, you'll be asked to configure the installation options. The defaults should be fine for most users. Click Next:
The installation might take a few minutes. When the installation is complete, click Next.
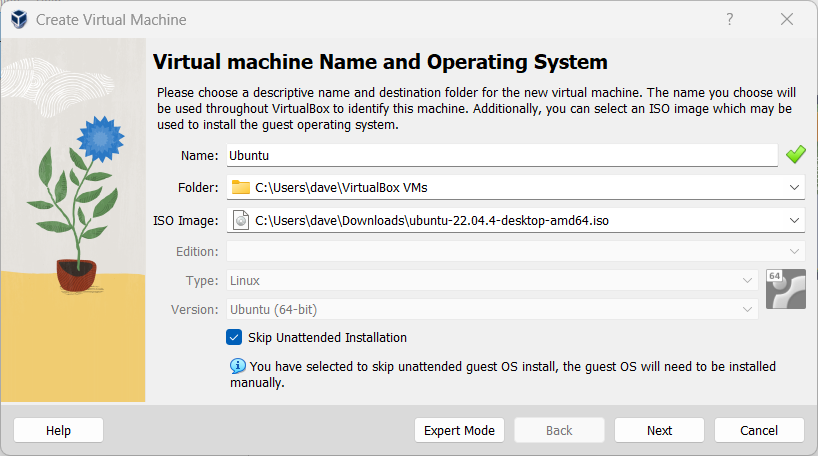
Open VirtualBox and choose New to create a new virtual machine. For Name, enter Ubuntu, and for ISO Image, select the Ubuntu image you downloaded. Check the Skip Unattended Installation box, and then click Next:
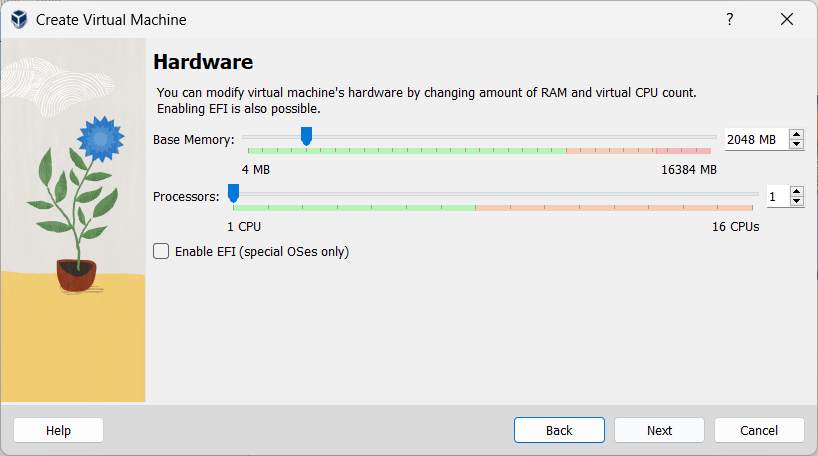
The Hardware screen allows you to set the memory and the number of processors for the machine. Leave these options at their default settings and click Next:
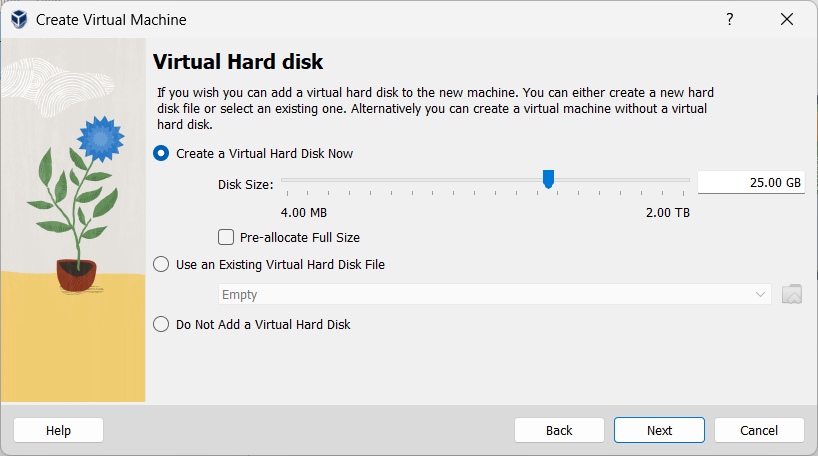
You'll be prompted to set up a virtual hard disk. I recommend the default options for most users. Click Next:
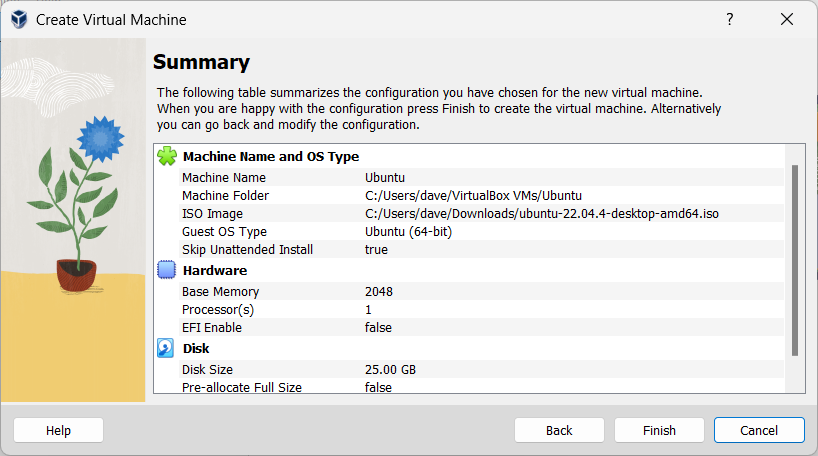
Finally, you should see the Summary screen. Click Finish:
After a few minutes, you should see your new virtual machine in the main VirtualBox window. Select the machine and click the Start button (the green arrow). It may take a few minutes for the first startup to complete.
If this step fails, you may need to go to Turn Windows Features On or Off in the control panel and disable the Hyper-V and Windows Sandbox features.
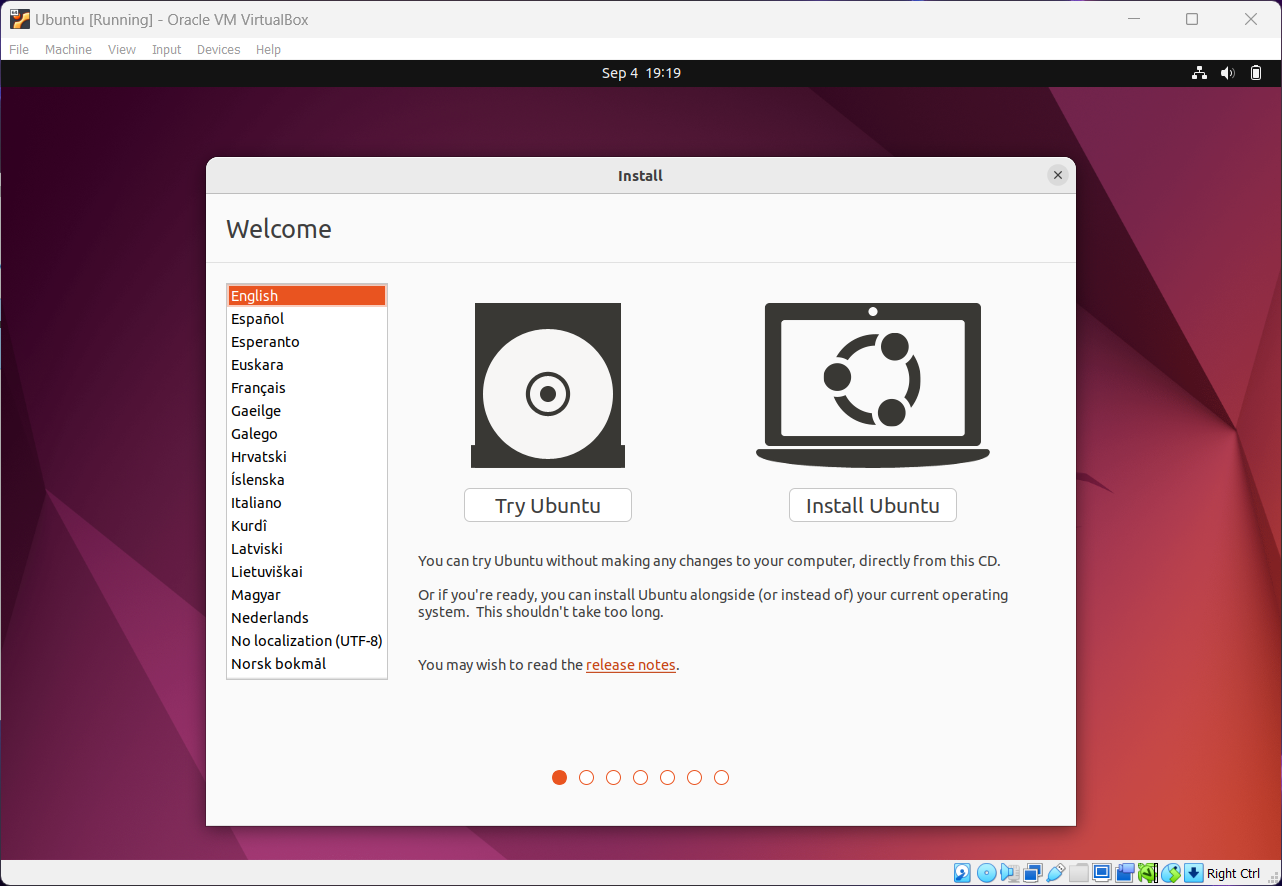
When the Ubuntu installer starts up, choose Install Ubuntu:
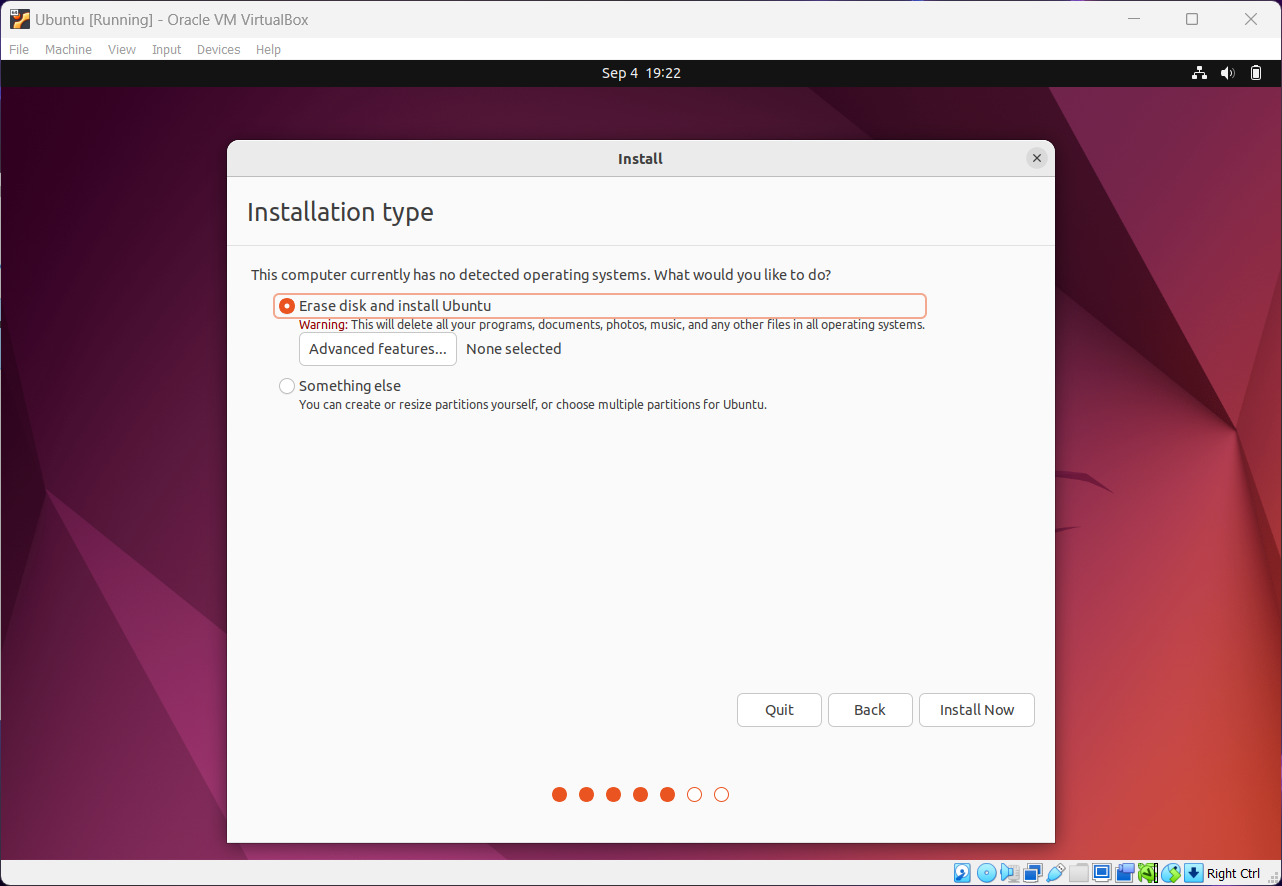
The next series of screens allow you to configure language preferences, which components are installed, and more. You can leave these options at their default settings. In the Installation Type dialog, choose Erase Disk and Install Ubuntu. This won't remove any of the data on your Windows machine; it will just ensure that you have a clean installation on your virtual machine. Click Install Now:
When you see a pop-up message reading "Write the changes to disk," choose Continue.
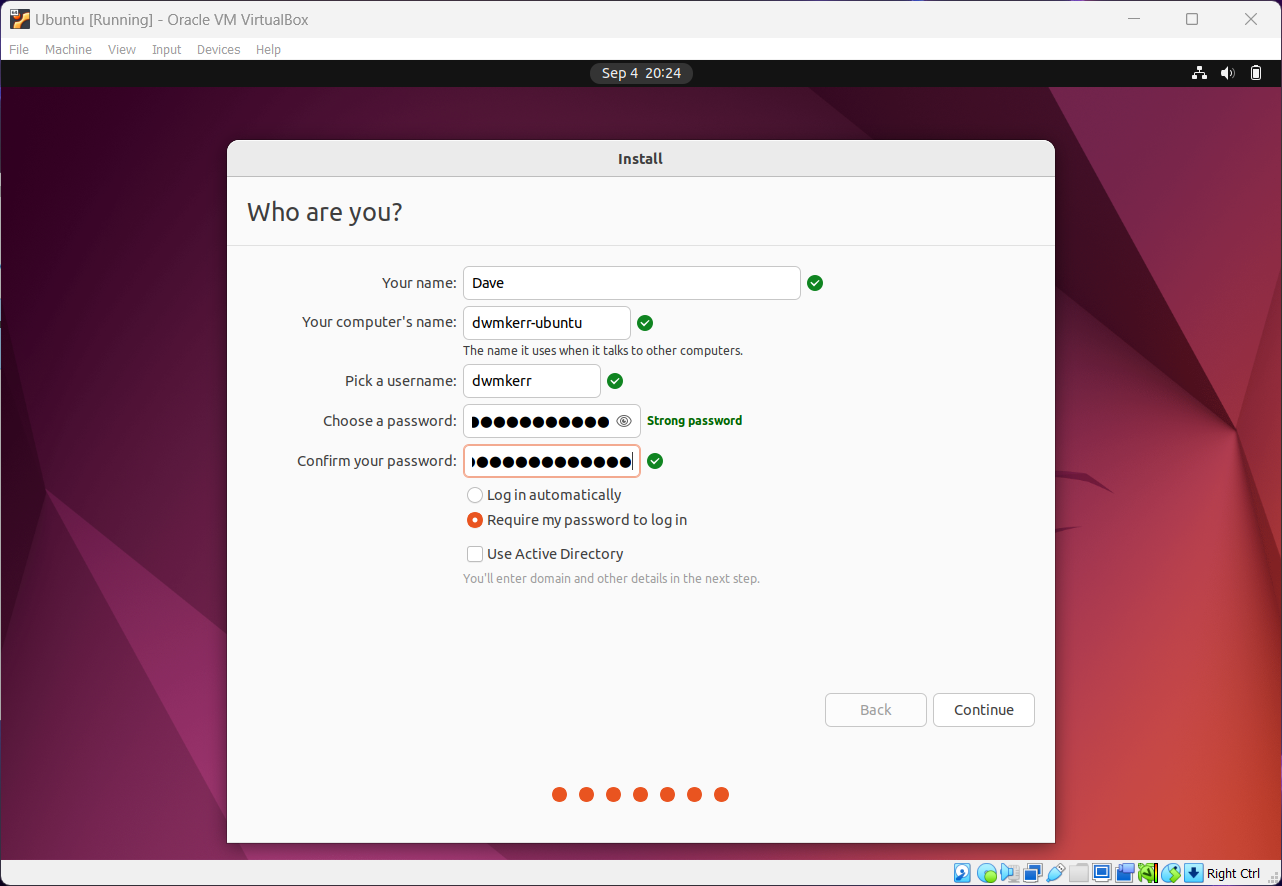
The final step is to choose a name for the computer, a username, and a password. You can use any values you like here, but make sure to record your username and password as you'll need them to log in later on. Click Continue to start the installation:
The installation might take a little while. When it is complete, you'll need to restart. If you get the error "Please remove installation medium," power off the machine and restart it. After that, you should be able to log in to the machine with the credentials you specified earlier.
Once you've logged in, click the applications icon on the bottom left of the screen. Type terminal in the search box to find and then launch the Terminal application.
You are now running Bash in the Terminal program. You can run the whoami command to show the current user or bash --version to see the version of Bash that's installed.
Congratulations! You now have a virtual machine running Ubuntu and Bash, and you're ready to start experimenting with the shell.
Option 3: Set Up the Windows Subsystem for Linux
WSL is a set of features that allows users to install a Linux distribution on their Windows machine. This is a great way to use Bash without having to set up a virtual machine. And it's the best option for power users or experts who want to use the latest WSL features and build their skills with the platform as soon as possible.
First, go to Start > Command Prompt > Run as Administrator. At the command prompt, enter the following:
wsl --install
You'll be asked to enter your password. For any pop-ups that appear asking for permissions, click Yes.
Next, open the Microsoft Store and type Ubuntu in the search box. Click Get to install the Ubuntu app. Once it is installed, choose Open from the Microsoft Store page or search for Ubuntu in the Start menu to open it. The app will take a few minutes to initialize. If you get an error message, restart Windows. To complete the setup, enter a username and password when prompted:
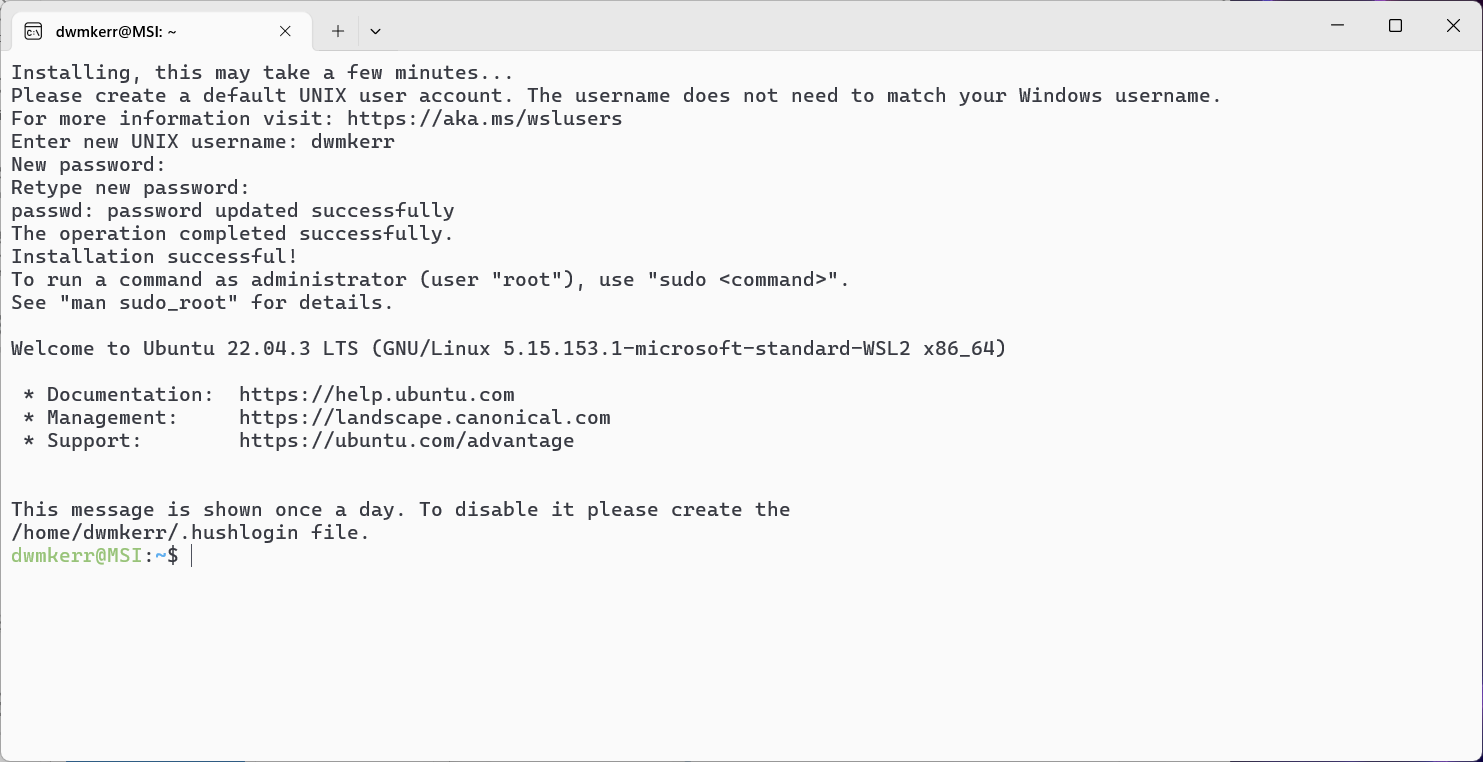
You're done! Now you can open the Ubuntu app at any time to use Ubuntu on Windows, with Bash as the interface.
macOS
If you're a Mac user, you can probably run the standard Terminal program and follow the material in this book without making any changes. However, the version of Bash that comes installed by default on macOS is version 3.2.x, which is out of date, so I strongly suggest that you upgrade it. Not only that, but as of macOS Catalina, the default shell is the Z shell. While the Z shell should work fine for all of this book's examples, you might want to switch to Bash to be on the safe side (you can always change it back later).
To install the right software, you'll use Homebrew, which is free and open source. Homebrew is a package manager, a tool used to install software on your computer from the shell. It's kind of like the App Store but for shell users.
First, go to https://brew.sh and follow the instructions to install Homebrew:
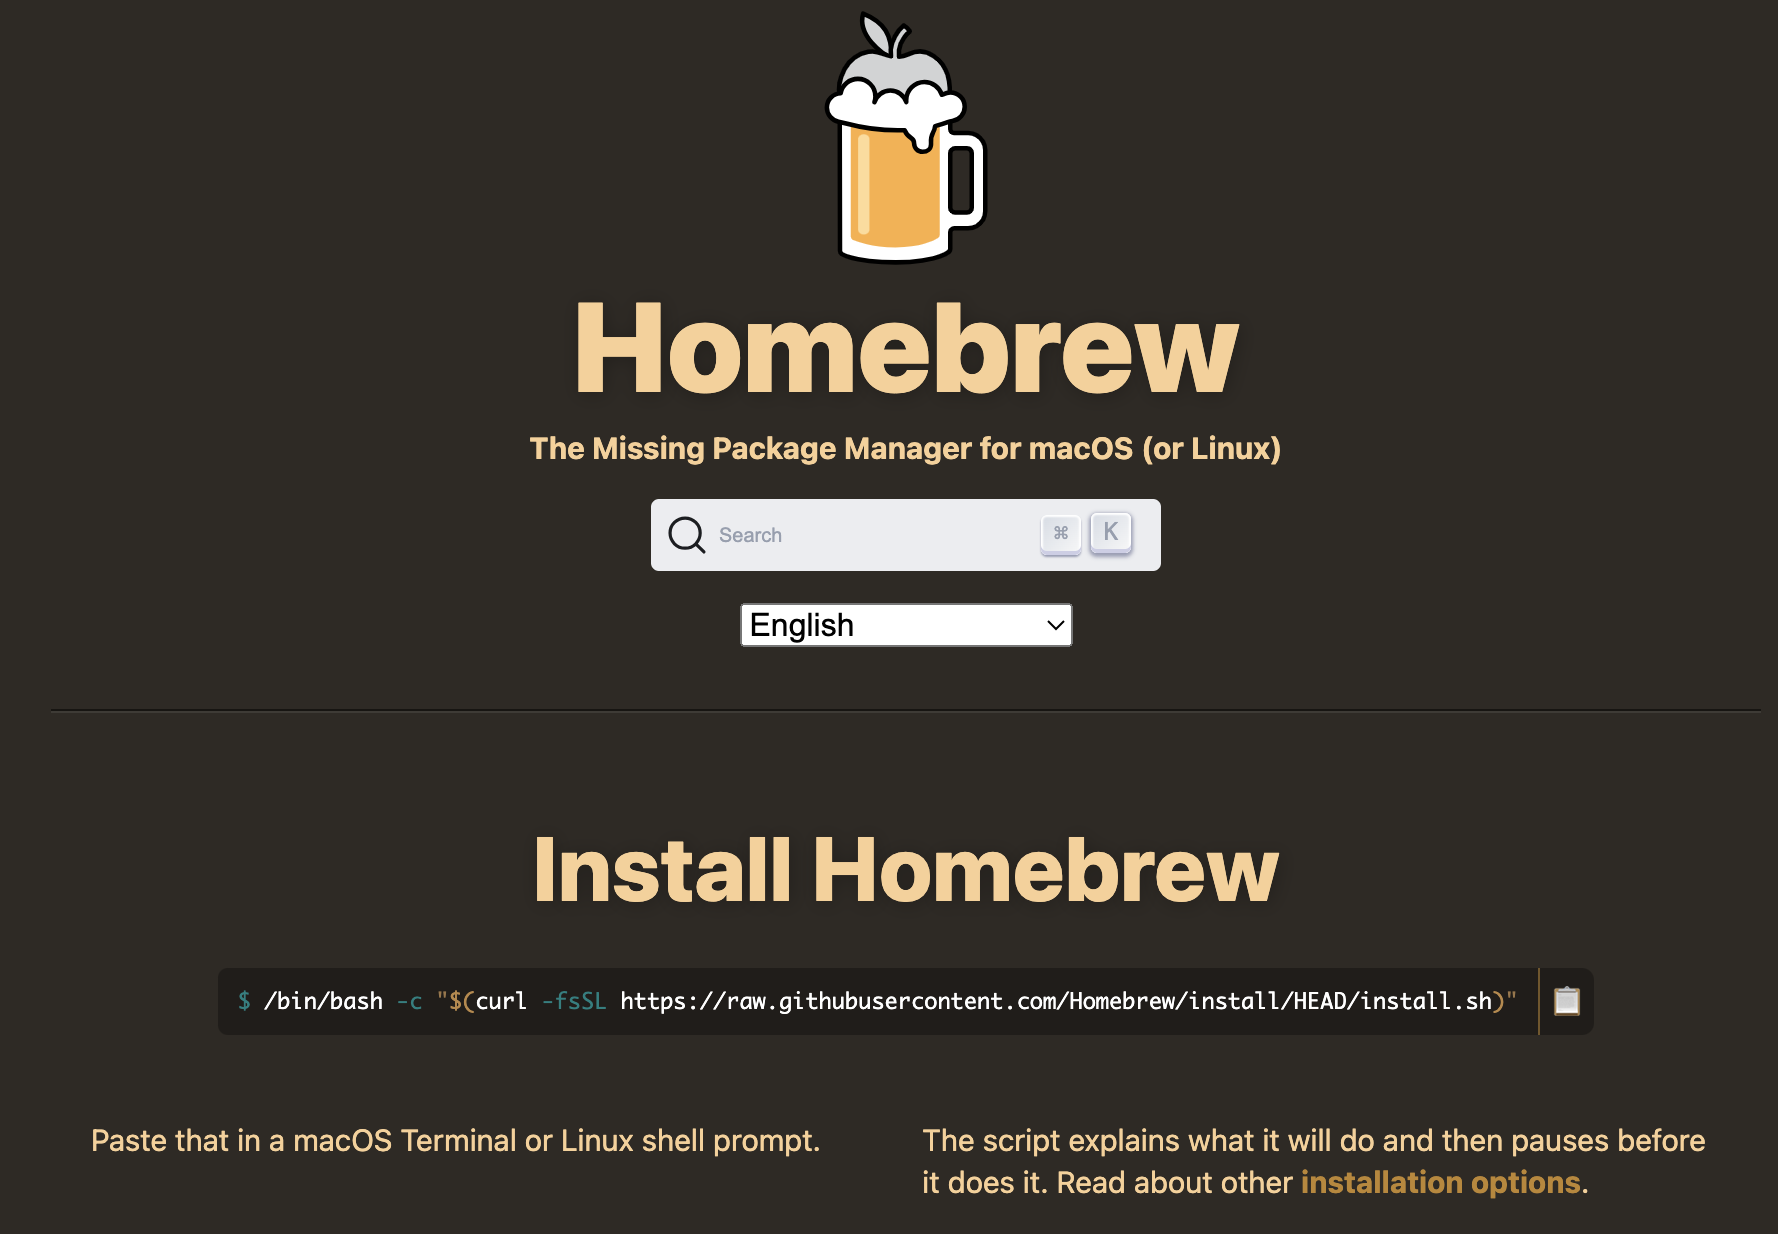
In most cases, this will require opening the Terminal program and running a snippet like this:
/bin/bash -c "$(curl -fsSL https://raw.githubusercontent.com/Homebrew/install/HEAD/install.sh)"
The exact code might have changed since the time of this writing, so check the website for the latest instructions. Be sure to use double quotes; otherwise, this command won't work properly.
Once Homebrew is installed, install Bash by running the following command in the shell:
brew install bash
The brew command uses the newly installed Homebrew tool to install the Bash program.
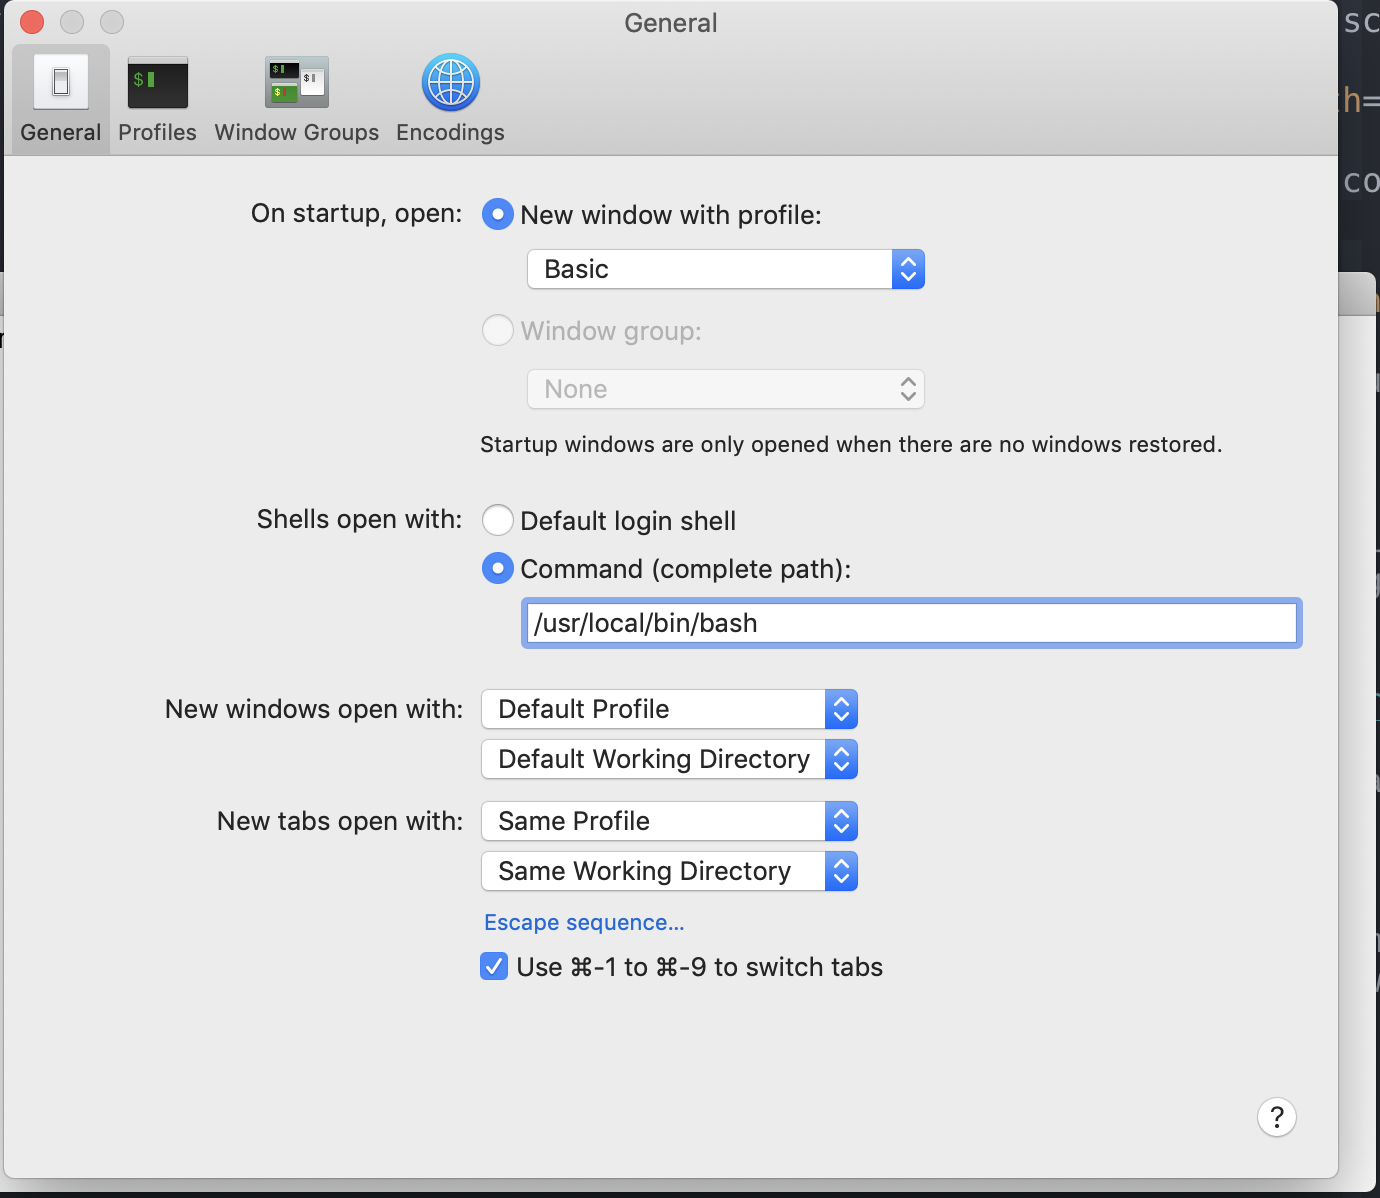
Next, you need to update your Terminal preferences to use the version of Bash you've just installed, rather than the default. Open the Terminal program, go to Terminal > Settings > General, and set the shell location to /usr/local/bin/bash:
Once you've made this change, open a new Terminal window and run echo $BASH_VERSION to confirm that it's running the latest version of Bash, which should be version 5 or greater.
There's a more sophisticated way to change your system's default shell: with the special chsh ("change shell") command. Chapter 15 goes over this approach.
Linux
If you're running Linux, I assume you can open a terminal and set up the appropriate shell. You'll be able to follow along with the content in this book with any recent Bash-like shell.
Summary
In this appendix we learned:
- How to open the shell programs for Windows, Mac and Linux
- How to configure shells for Windows or Mac to behave in a Linux-like way
With these tasks complete we can now move onto the next chapter.